With over three billion active users, it’s no surprise that businesses are using Facebook to advertise their products and services. Recent Birdeye research found that consumers spend an average of 14.1 minutes looking at a service provider’s social media pages, so your Facebook presence can significantly impact the customer experience.
Previous Facebook business tools were challenging to maintain because they worked independently. Facebook Business Manager helps page owners manage all their marketing tools in one place, giving them more time to focus on growing and developing their businesses.
Table of contents
What is Facebook Business Manager?
Facebook Business Manager (now known as Meta Business Suite) is an all-in-one platform that securely manages all of your Facebook business communication and assets, such as:
- Company pages
- Ad accounts
- Ratings and reviews
- Business inbox
Why use Facebook Business Manager?
Business Manager can be a central hub for all your Facebook business resources. This makes monitoring activity and creating detailed reports measuring customer engagement and ad performance easy. With Business Manager, you can also grant access to third-party partners (vendors, agencies, etc.) while still maintaining account ownership.
If several people are on your team, each person can have their own Business Manager account and work independently from clients or coworkers. Unlike a shared login, separate accounts can help avoid overlap and prevent security breaches. You can also link your Facebook Business Manager account to your Instagram Business account.
Additionally with Business Manager, you can keep your personal profiles separate from your business page. Keeping business activity separate from your personal accounts helps ensure posts aren’t in the wrong place. Plus, other people with access to your Business Manager account won’t have access to your personal information. They can only see your name, work email, business pages, and ad accounts.
What are some benefits of Business Manager?
We saw how the Meta Business Suite can serve as a hub for all your business assets. This makes reporting more accurate, helping to optimize ad campaigns. Analytics can be a game-changer for data-driven businesses, but Facebook Business Manager’s benefits go beyond just monitoring and reporting. They also include:
- Various permission levels so users have access to what they need
- Customizable audience settings for targeted advertising
- Simple management of multiple pages and ad accounts
- Access to analytics for each account
- Ability to create block lists
- Simple payment and billing management
Advertising and PR agencies can use Facebook Business Manager to send requests to clients asking for access to their pages and ad accounts. Once this permission is granted, the agency can become an analyst or advertiser on behalf of the client.
Easy communication with Business Manager
Another benefit of Business Manager are its communication tools. Being able to talk with your customers to help answer questions, provide updates on promotions, or just show your appreciation is vital to customer relationships.
With the “Ratings and Reviews” and “Business Inbox” features, Business Manager allows you to take full advantage of omnichannel communication.
Customer reviews
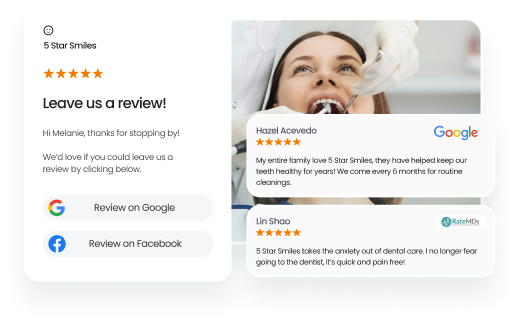
Reviews are a good way for people to better understand products and services because they come from actual customers. It’s important that your team frequently checks and responds to reviews so customers can see that their opinion matters.
Business Manager makes it simple to manage your reviews by including this feature alongside your other Facebook business assets. To access your customer reviews head to “More Tools” and select “Ratings and Reviews.” For a complete understanding of Facebook reviews, check out our post.
Business inbox
Another helpful Business Manager communication tool is their business inbox. The inbox has the ability to combine both your Facebook and Instagram communication into one location. This is important because customers want the freedom to contact businesses on their terms. The capability ensures that you don’t miss another message and can answer questions in a timely manner. You can find the business inbox on the left side panel under “Main Menu > Inbox.” To learn more about Facebook communication, take a look at our Facebook Messanger Marketing article.
Creating a Facebook Business Manager account
If you’re new to Facebook Business Manager, you’ll need to create an account and provide some baseline information to get started. But before that, it’s important you decide who you want as primary admins on the account.
Step 1: Choosing your primary admins
Make sure you choose your primary admin carefully because this person will be responsible for inviting and granting access privileges to other team members. The primary admin will also have control over payment methods and billing information.
It’s recommended to have more than one primary admin on your Business Manager account. That way, you’ll avoid being locked out from the account if there’s a security breach, an employee leaves your company, or something else unexpected happens.
Organizational hierarchy differs from business to business. That means the role of primary admin will depend on your specific situation. For example in an enterprise setting, the Chief Marketing Officer or Social Media Manager could be your primary admin. For smaller businesses, it could be the owner or CEO.
Step 2: Create your account
After choosing your primary admin, it’s time to create your Business Manager account.
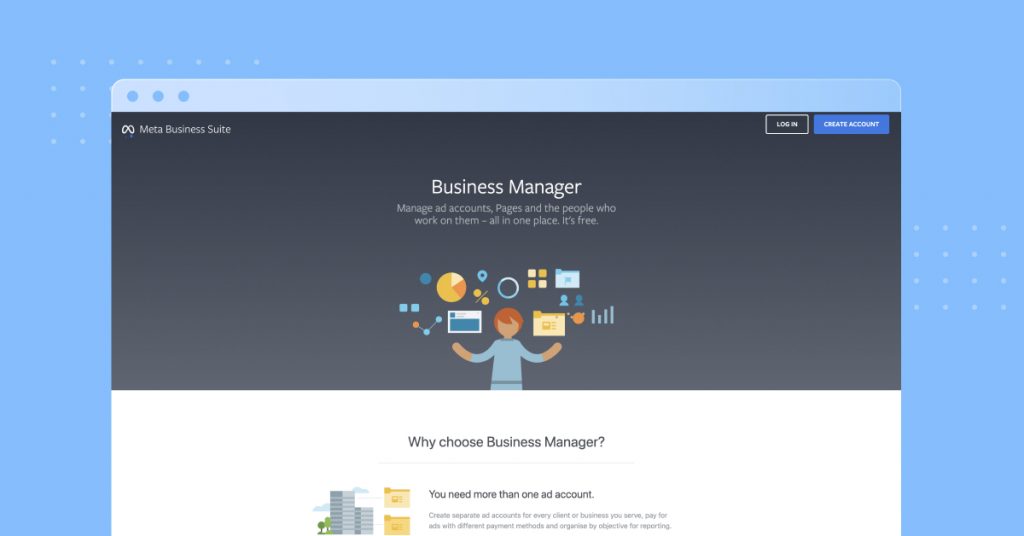
- Head over to the Business Manager home page and click “Create Account.”
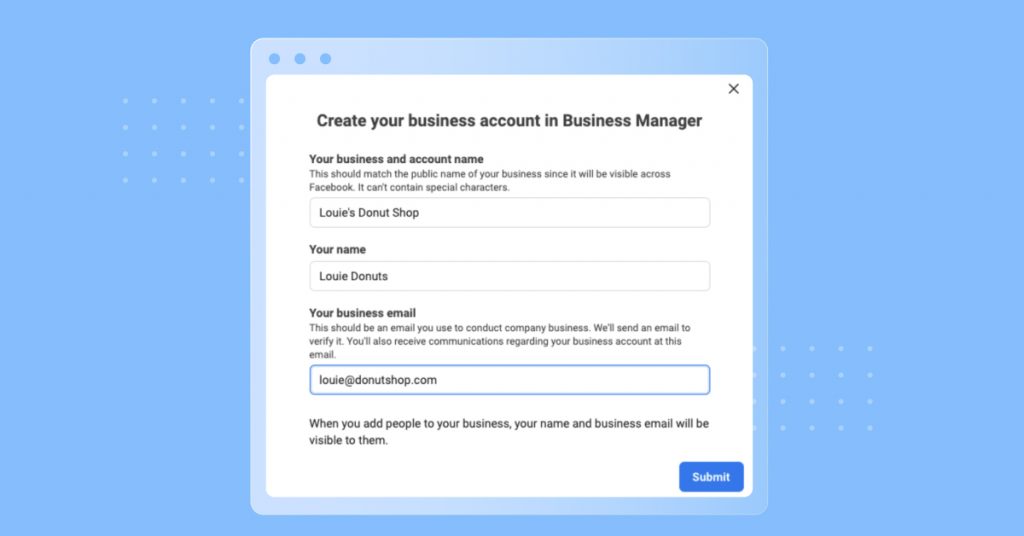
2. You’ll then be asked to provide some information about your business, including your name, user name, and email. After the initial setup is complete, you’ll have the opportunity to add even more details about your business. On the left panel, click “Settings > Business Account Info > Go to Business Settings.”
3. Next, you’ll need to verify your account via email using the email address you provided. If you haven’t received the verification email within a few minutes, check your spam folder. After you’ve verified your account, your primary admins will have full access to the Facebook Business Manager platform.
Step 3: Connect your Facebook business assets
Once you’ve successfully created your account, you can start connecting all your business assets. The most common assets include your business pages, ad accounts, and people.
Pages
You’ll want to add your Facebook business page to the account first. To make things easy, we’ll assume you already have an active business page – but if you don’t, check out our post on how to create a Facebook business page.
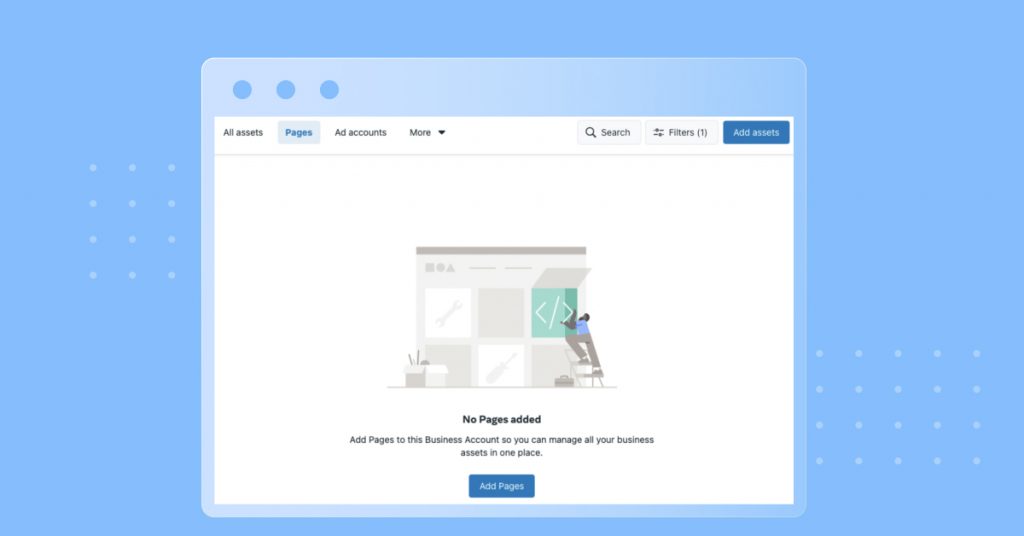
1. On the left side panel, click “Settings > Business Assets.” Next, click the “Pages” tab located across the top and then the “Add Pages” button.
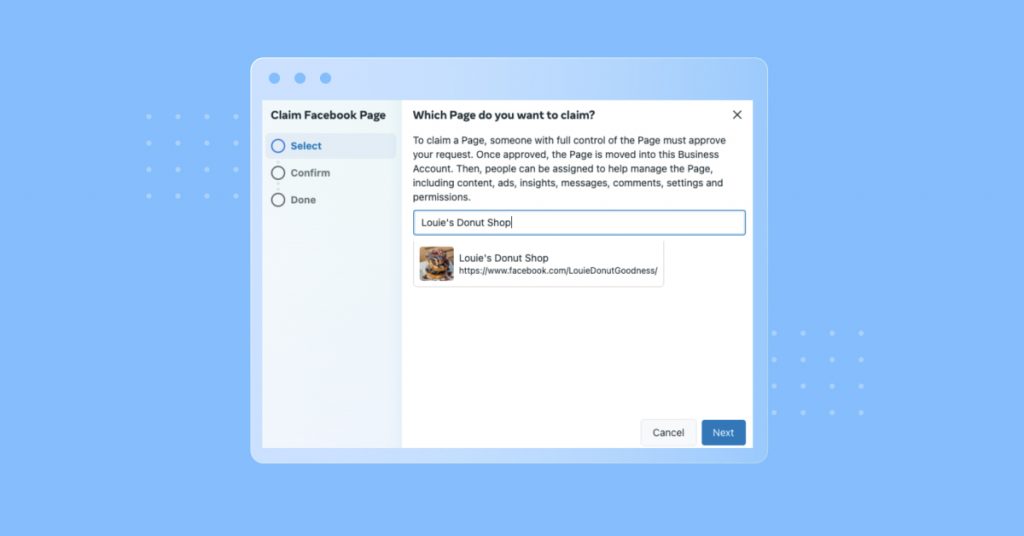
2. Type in your Facebook business page name in the text box. Once you’ve located your business’s page, select it and click “Next.” If you’re an admin of the page, your request will be approved automatically.
3. If you have several business pages, repeat steps #1 and #2 until you’ve added them all to your Business Manager account.
Ad Accounts
After connecting your business page(s), you’ll also want to add any ad accounts linked to your business. The initial steps are very similar to how you add a business page.
1. On the left side panel, click “Settings > Business Assets.” On the right side of the screen, click the blue button labeled “Add assets.” Under the “Advertising” category in the next window, select “Ad account.”
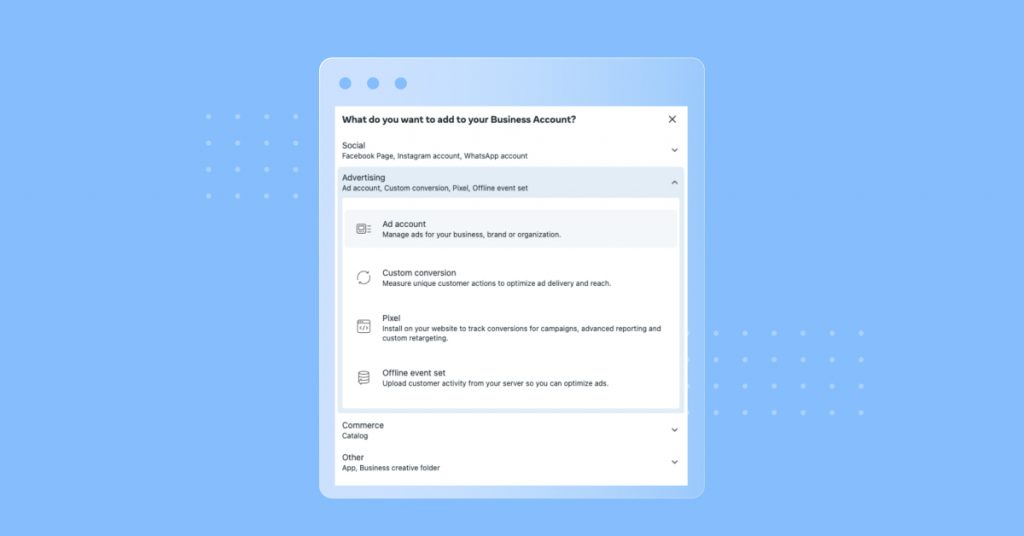
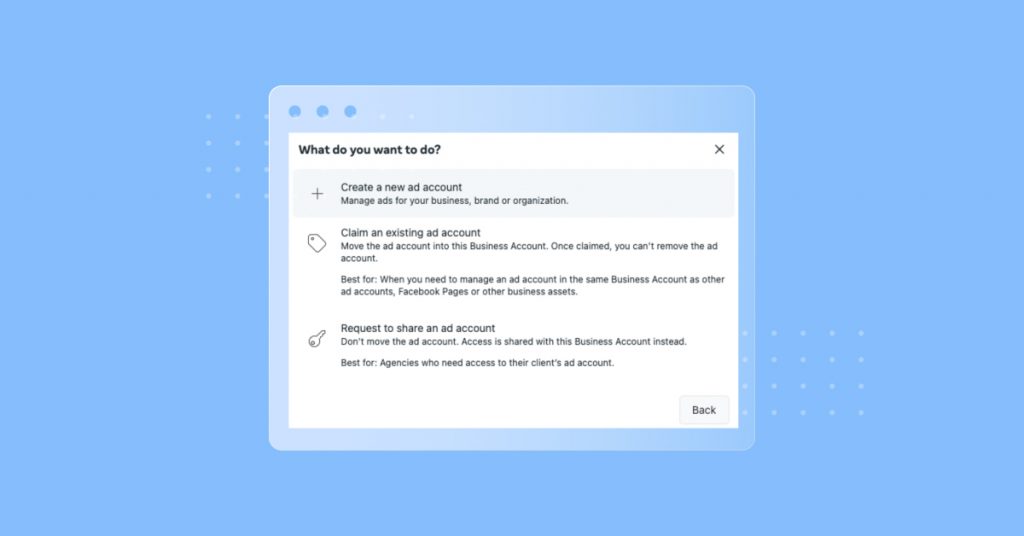
2. You’ll have three options to choose from:
- Create a new ad account – This option is for businesses that don’t have an existing ad account.
- Claim an existing ad account – Choose this option if you already have an ad account you’d like to import into your Business Manager.
- Request to share an ad account – This option is primarily used by agencies looking to manage a client’s account.
If you need help claiming or requesting an ad account, check out the Business Manager help center for more information.
3. After selecting the “Create a new ad account” option, you’ll be asked to add your account details.
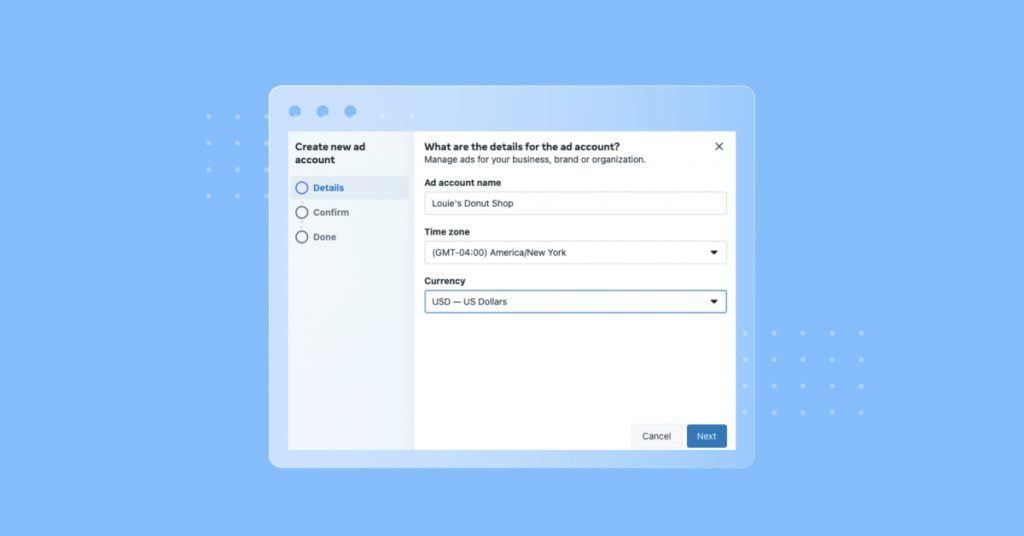
4. Once you’ve added the required information, click “Next.” You’ll be asked to confirm you want to continue adding the new ad account. If everything looks correct, click the “Create ad account” button.
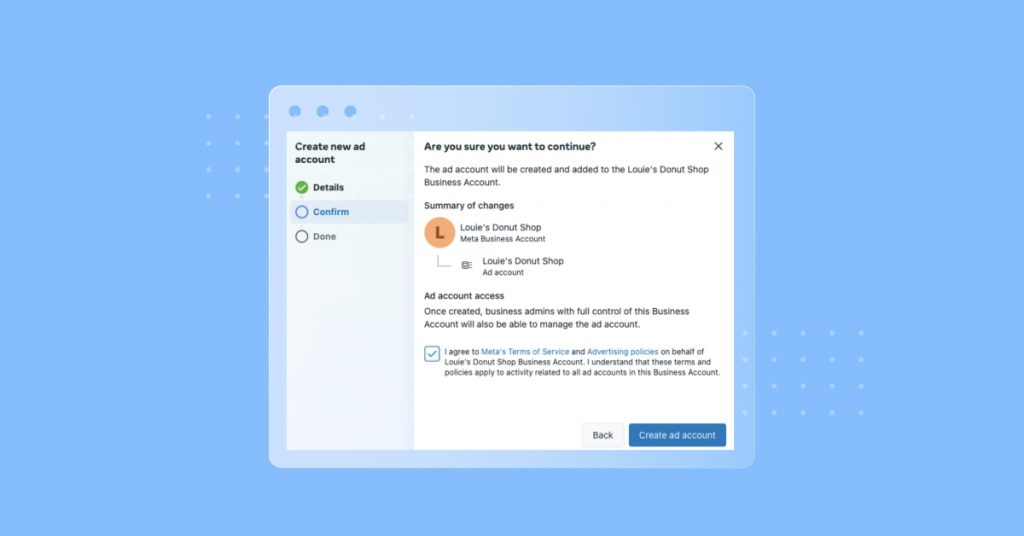
Keep in mind that in order to run ad campaigns, you’ll need access to at least one business page.
People
After creating your business page and ad account, you’ll want to make sure your employees can access your assets if they need to.
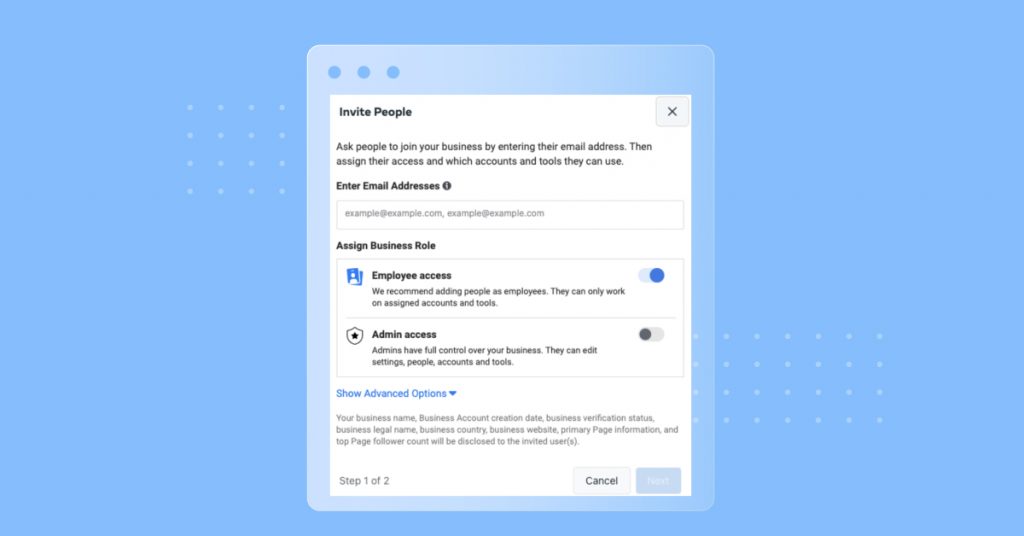
1. To add users, head back to the left panel and click “Settings > People.” On the right side of the screen, click the gray button labeled “Add people.”

2. In the next window, enter the email address of the person you’d like to give access to. As a default, “Employee access” is initially assigned to each person. If you want to give someone “Admin access”, you’ll need to manually toggle from the “Off” setting to “On.” Once you’ve made your selection, click “Next.” Repeat these steps if you’d like to give multiple people access to your account.
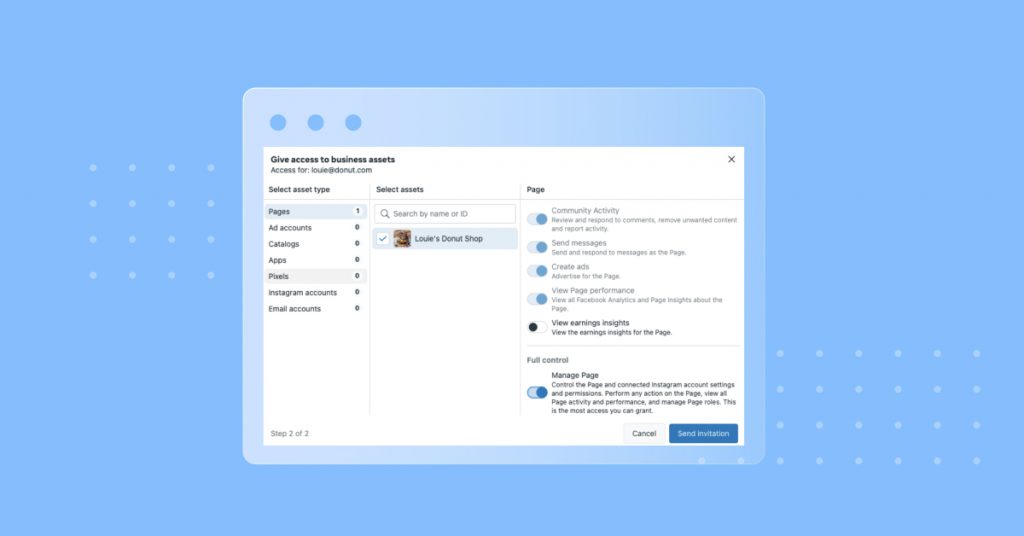
3. In the next window, you’ll be able to further define someone’s access privileges specific to each business asset. It’s important to make sure each person has the appropriate access. That way, they’ll be able to do their work effectively while making sure the account is still secure. If an employee’s role changes, as they often do, admins will be able to easily change access later.
How to create your first ad campaign
After you’ve created your Facebook Business Manager account and added your business assets, you can move on to the next step: creating your first ad campaign.
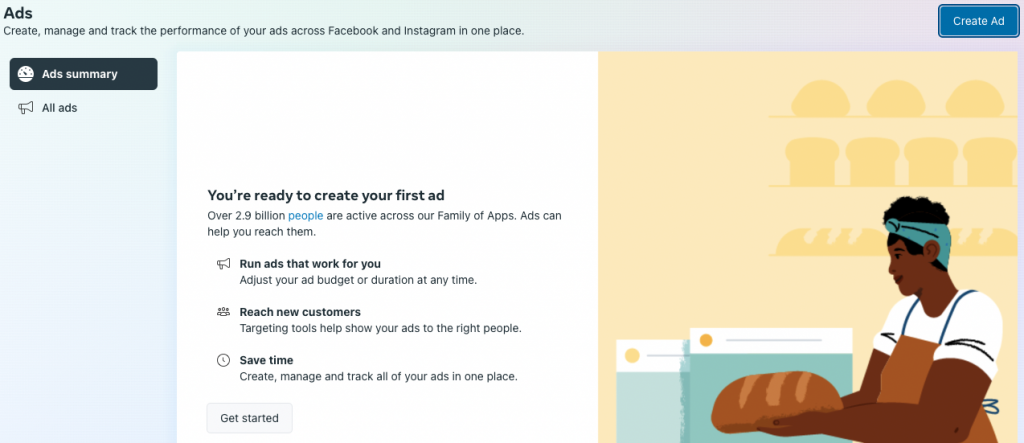
1. On the Business Manager homepage, select the “Ads” option on the left panel. On the Ads page, click the “Create Ad” button in the upper right corner.
2. When choosing a goal, think about what you’re trying to achieve with your campaign. For example, if you’re interested in raising brand awareness, you might select the “Promoting your Page” goal. If you’d like to increase traffic to your website, you’d likely choose the “Get more website visitors” option.
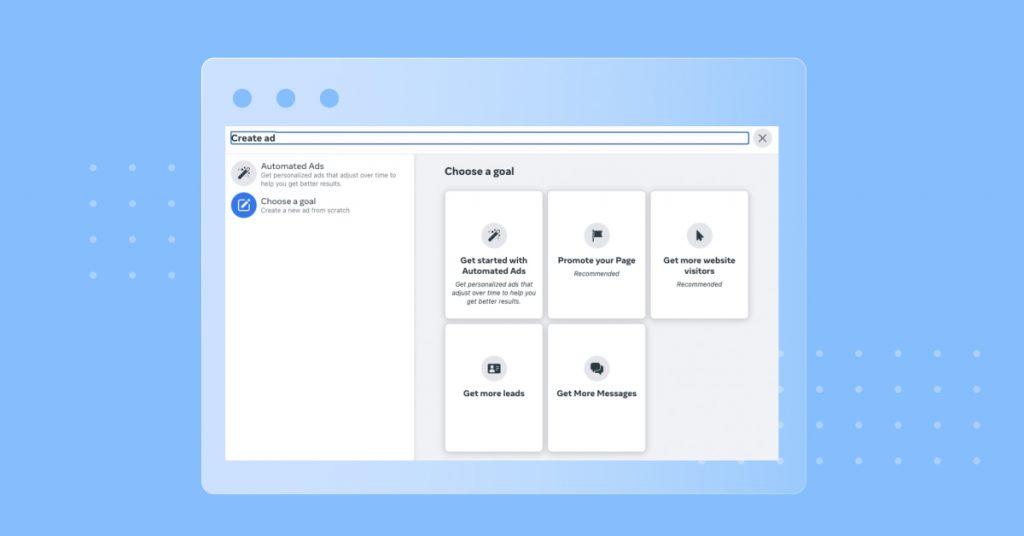
3. After you choose a goal, you’ll be able to:
- Design the post
- Adjust demographics for your ideal audience
- Apply your URL and a Call To Action button
- Select your flight dates
- Set the daily budget
- Select payment method
4. After adding this information, you’ll have the option to publish the ad immediately or schedule it for a later date.
Frequently asked questions about Facebook Business Manager
Yes, you can find the Meta Business Suite app in the App Store or Google Play. Once you’ve downloaded the app, you’ll have access to a general overview of your account. You’ll also be able to post on your page and reply to comments.
Yes. When you’re adding assets to your business account under the “Social” section, you’ll have the option to link an Instagram and/or WhatsApp business account.
Meta Business Suite simplifies front-end tasks, allowing you to manage posts, insights, and messages across both Facebook and Instagram in one convenient hub. It provides the administrative tools you need to manage ad campaigns, set user permissions, and oversee critical assets like pages, catalogs, and datasets, all with precision and ease.
Stay connected with Birdeye Messaging AI
Facebook Business Manager can certainly help streamline activities like ad campaigns, business page management, and customer communication. But in order to remain relevant, most businesses depend on multiple channels of communication which is often difficult to stay on top of.
With Birdeye Messaging AI, we make it easy for you to connect with your customers on the channel of their choice and from the convenience of a single inbox.
Engage web visitors with AI: Messaging AI lets you automatically interact with website visitors, ensuring timely engagement.
Real-time lead chat with automated FAQ answers: Messaging AI handles frequently asked questions instantly, saving time and improving customer experience.
AI voicemail transcription: Messaging AI can help ensure you quickly transcribe voicemails into text for easier management and response.
AI-assisted replies: Messaging AI provides suggestions for better responses to enhance communication quality.
Conversation summaries in seconds: Messaging AI quickly summarizes lengthy conversations for faster understanding, deeper comprehension, and quicker action.
Watch our demo and see how Birdeye Messaging AI can help you improve the customer experience for continued success.
Social media software with Gen-AI, designed to make your life easier
Want to see the impact Birdeye Messaging AI could have on your business? Watch our Free Demo Now.
Originally published


