If your customer searches for your business on Apple Maps, are you listed there?
Millions rely on Apple Maps for navigation and local searches, and listing your business on Apple Maps can significantly boost your visibility and credibility.
Are you looking for a quick answer on how to add a business to Apple Maps?

To list your business to Apple Maps, create or claim your listing, provide accurate information, choose the right category, upload photos, and manage reviews.
Want a detailed step-by-step process? Skip to the section from our table of contents:
Table of contents
Adding your business to Apple Maps in 5 simple steps
Step 1: Create an Apple ID
Half the work is already done if you already have an Apple ID. You just need to log in to add a business to Apple Maps.
If you don’t have an Apple ID, don’t worry. It’s a simple sign-up process that’s quick and free.
Step 2: Go to Apple Business Connect
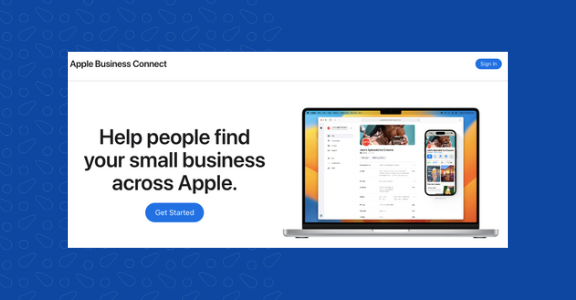
Apple Business Connect is where you can add a business listing on Apple Maps. You’ll be prompted to set up language preferences and what notifications you receive to opt in or out of getting updates from Apple.
Click the “Get Started” button, and enter your Apple ID.
Step 3: Search for your business
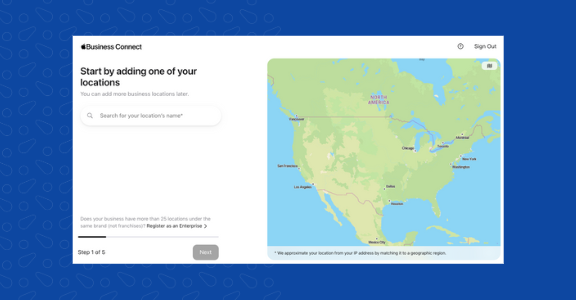
It may be that your business is listed on Apple Maps. To avoid a double listing, search for your business using your zip code, city, keyword, or business name to see if it comes up in the results.
- If your business is listed, claim it
- Verify the complete profile to ensure your business is listed on Apple Maps.
- Double-check that all your listed information is correct.
- Then, select “Claim this business.”
- If your business is NOT listed, add it
If you think, why isn’t my business showing up on Apple Maps? it may so be that your business isn’t listed.
Just tap the “Add a new location with this name” button and follow the prompts to fill out your business’s profile information.
Follow the remaining 3 steps to add your business on Apple Maps:
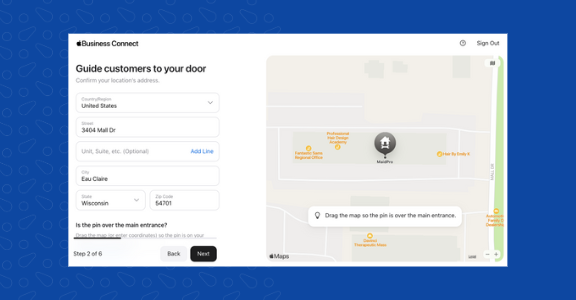
Step 4: Set the location and add your business details
When adding business to Apple Maps, look over the listing and make sure that all the information is accurate and up to date and:
- Verify that your address, phone number, and website address are correct.
- Fill in the current address, working hours, descriptive details about your business
- Ensure that there are relevant keywords in Apple Maps’ business listing, allowing it to easily appear in search results.
Use AI-powered Birdeye Listing to automatically generate the most-searched keywords related to your business. Seamlessly add them to your business’s descriptions and rank higher when customers search for you.
- Once you’re satisfied, you can verify your business.
Step 5: Wait for Apple to verify you
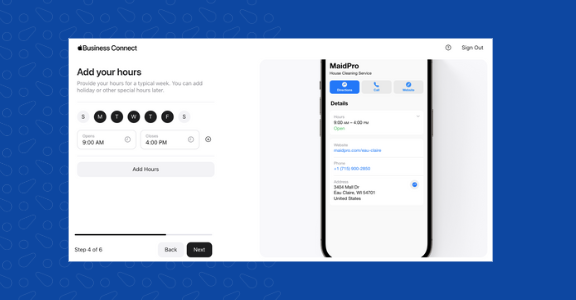
You’ll need a verification code once you’ve added your business to Apple Maps. If you’ve entered your business’s phone number, Apple will call you and give you a verification code to enter.
Once you do that, you’re officially verified.
If you cannot answer the phone during set-up, there’s also an option to verify later.
Yes, that’s it! Adding business to Apple Maps is this simple.
Follow the steps above to create/claim your listing, select the category of your business, fill it with the correct details, and get verified by Apple.
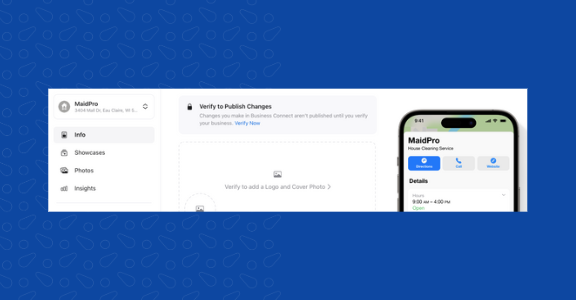
Benefits of adding your business on Apple Maps
People can also look at Apple Maps’ ratings and photos of different businesses. Rather than relying on other review sites, users can directly leave their Apple Maps reviews on a business’s profile.
If your business has solid overall ratings, then people will be more inclined to stop by when it appears in their search.
Here are a few other benefits of adding your business on Apple Maps:
- Being listed on Apple Maps adds credibility
Customers tend to trust businesses listed on reputable platforms like Apple Maps, increasing the likelihood of them choosing your services over competitors.
- Positively influence local SEO marketing
It enhances your business’s local presence and improves the chances of appearing in Google’s “Local Pack” when users search for related services.
- Registering your business on Apple Maps is free marketing
It is a cost-effective way to enhance your online presence and boost customer reach.
- Humanize your brand on Apple Maps
Because it allows you to upload photos and videos of your business, these create a more engaging profile and give potential customers a better understanding of your offer.
Now that we know how it can help your company, let’s go over how to add your business to Apple Maps.
Where does Apple Maps pull business info from?
Apple Maps pulls business information from a variety of sources to provide accurate and up-to-date data to its users. Here are some of the primary sources:

1. Apple's own data
2. Third-party data providers
3. User contributions
4. Apple Maps connect
5. User location data
How can my business appear on Maps? Optimizing your Apple listing
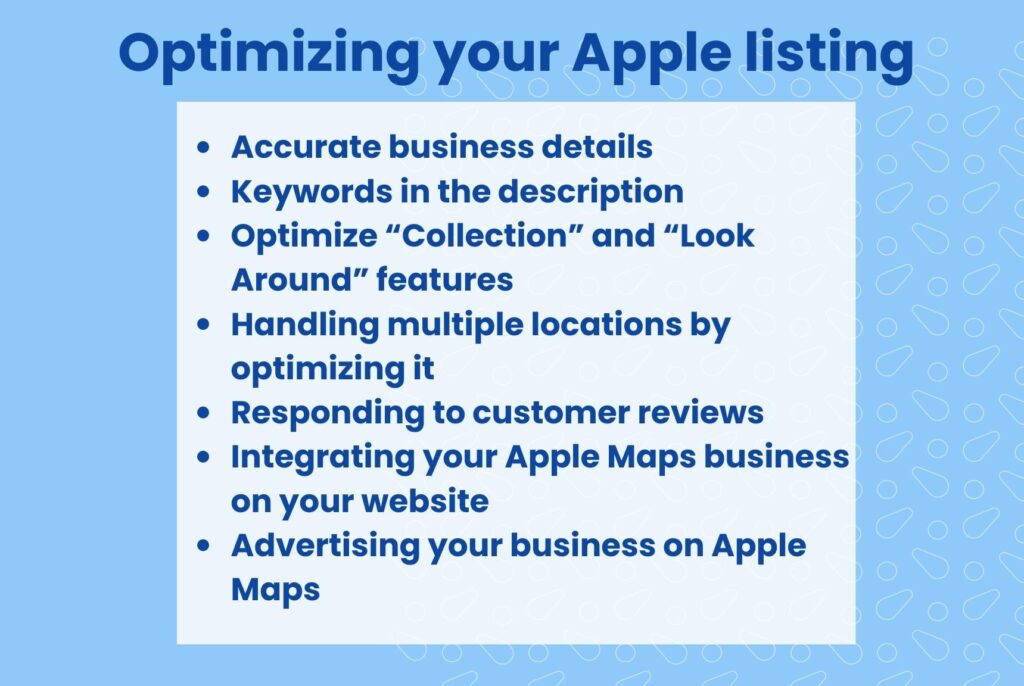
Now you know how to add your business on Apple Maps, you should take steps to optimize your listing. Doing these will definitely make your business appear on Maps.
While getting verified will get you on the map, literally, Apple rewards those who put in a little extra effort in their profile. Once Apple Maps add a business to its platform, make sure you optimize it properly by:
Accurate business details
You want all your information to be as accurate and up-to-date. This includes business descriptions, hours, phone numbers, websites, addresses, and social media accounts.
An accurate listing can make it simpler for local customers to discover your business.
Keywords in the description
When you add a business on Apple Maps with relevant keywords that describe your services, you make it easy for your target audience to connect with your business. By knowing what people are searching for and using those terms, you can make sure they’ll find your business.
For example, if you’re a residential cleaning service, you’ll want to include keywords like:
- Residential cleaning
- House cleaning
- Housekeeping
Optimize “Collection” and “Look Around” features
On registering your business on Apple Maps, it gives you two unique features: the “Collection” feature and the “Look Around” feature.
“Collection” is a way for people to bookmark locations they want to visit in the future.
The “Look Around” feature allows Apple Maps users to have a 360-degree view of an area.
A business can use these features by adding images to its profile. Not only does it draw more attention to what you’re offering, but it gives a better picture of what your business actually is. If it’s enticing enough, people may add your business to their “Collections” to return to later.
Handling multiple locations by optimizing it
If you have multiple business locations, you can manage them all through the Apple Maps Connect dashboard. Follow the same steps for each location, ensuring accuracy and consistency across all listings.
Responding to customer reviews
Once you have added your business on Apple Maps, you’ll eventually get customers from there. And you can capitalize on those by asking customers for reviews.
The more customer reviews you get, the better chances of you saying you were adding your business to Apple Maps has been a success because customer reviews can influence potential customers’ decisions.
Take the time to respond to both positive and negative reviews promptly. Address any concerns and show appreciation for the positive feedback.
Integrating your Apple Maps business on your website
Adding a business to Apple Maps will be as profitable as you’d want it to be. And one of the ways is to take advantage of Apple Maps integration on your website.
By adding Apple Maps widgets or links, you make it easier for visitors to find your physical location, leading to better customer engagement.
Advertising your business on Apple Maps
Apple offers advertising opportunities within Apple Maps to increase your business’s visibility further. Consider investing in paid advertisements to target a broader audience and boost your online presence.
Frequently asked questions about how to add a business to Apple Maps
Yes, you can manage multiple business locations through the Apple Maps Connect dashboard.
1 – Create an Apple ID.
2 – Access Apple Maps Connect.
3 – Check business eligibility criterion.
4 – Provide basic business information when registering on Apple Maps.
5 – Add detailed business information and update visuals.
Yes, Apple does make money from Apple Maps indirectly. While Apple Maps itself is a free service for users, the platform contributes to Apple’s overall revenue through various partnerships, advertising, location-based services, sponsored content, and integration with the Apple ecosystem.
To contribute, you can add your business on Apple Maps and make your business more visible to all Apple users.
There are several reasons why Apple Maps may not show your business. You may have:
1 – Incomplete or inaccurate information
2 – Verification pending
3 – Operate from a new business or location
4 – Ineligible business category
5 – Technical issues
No, business registering to Apple Maps is free.
The verification process may take a few days, but your listing should appear relatively quickly once it’s approved.
Apple Maps and Google Maps are similar. They help people discover, find and navigate to locations, including businesses. Each is unique in certain ways, but the functionality is similar.
Add your business to Apple Maps to grow your online reputation
We’ve gone over why it’s a good idea to add a business to Apple’s map application and an easy step-by-step guide on how to do it. All that’s left is for you to get in there and get your business set up and primed for positive reviews and high ratings.
Ultimately, adding your business to Apple Maps is a quick, easy process that will help reap big rewards. It’s just a few clicks away and could be the difference between getting noticed or remaining hidden in the vast pool of businesses out there.
Unlock business success with our in-depth Apple Business Connect guide – strengthen your digital footprint across Apple’s ecosystem.

Originally published


