To transfer Facebook page ownership, log in to Facebook Business Manager, go to Business Settings, click on Pages, select the page you want to transfer, and assign a new owner by granting them full Facebook access or ownership permissions. The new owner must be a verified individual or organization before they can accept ownership.
Summary
Facebook business pages are valuable assets for brands to connect with audiences, manage customer interactions, and build a strong digital presence. However, there are times when ownership needs to change, such as during organizational restructuring, agency transitions, or leadership changes. For multi-location brands and enterprises managing multiple social profiles, understanding how to securely transfer Facebook page ownership is essential. In this blog, we walk through the exact steps to transfer ownership using Facebook Business Manager and share best practices to ensure a smooth transition without disrupting your brand’s social presence.
Table of contents
- Why would you want to transfer Facebook page ownership?
- What you need to know before you transfer the ownership of your Facebook business page
- How to transfer the ownership of your Facebook business page
- Essential considerations when transferring Facebook page ownership
- Conclusion
- Frequently asked questions on how to transfer Facebook business page ownership
- Streamline social media management with Birdeye Social AI
Why would you want to transfer Facebook page ownership?
There are several reasons why you might want to transfer the ownership of a Facebook page:
- Business restructures: If your company undergoes changes, a shift in management or ownership might be needed.
- Partnership changes: You may hire a new business partner or delegate responsibilities to a trusted team member.
- Employee transition: When an employee who managed the page leaves, you must transfer ownership to a new team member.
- New organization takes over: If you’re selling your business or transferring the page to another company, the page ownership must be transferred to the new organization.
Regardless of the reason, following the correct procedure is crucial to ensure the page transfer is smooth and the new owner can take control of the page.
What you need to know before you transfer the ownership of your Facebook business page
Before jumping into the step-by-step process of transferring Facebook page ownership, here are a few things you should know:
- Business manager account: You must use Facebook’s Business Manager to transfer page ownership. Business Manager provides more control over page management, allowing you to assign roles and responsibilities.
- Page ownership requirements: The new owner must be an individual or an organization verified on Facebook. You cannot assign the page’s ownership without verification.
- Access to the page: If you aren’t already the page’s admin, you must be granted access before initiating the transfer process.
- Performing the transfer from a computer: The transfer process must be completed on a computer. You cannot transfer Facebook page ownership from the mobile app.
Pro tip: When managing user data and ensuring smooth transitions, it's essential to decline optional cookies to protect user privacy. In some cases, users may prefer to choose cookies by category to ensure they are comfortable sharing the data.
How to transfer the ownership of your Facebook business page

Here is a step-by-step guide on how to transfer ownership of a Facebook page:
Step 1: Access Facebook Business Manager
The first thing you’ll need to do is log into Facebook and access the Business Manager. This tool is central to managing your Facebook pages and assets.
- To access Business Manager, go to business.facebook.com and log in using your Facebook credentials.
- If you don’t have a Business Manager account, you’ll need to create one. Follow the instructions to set up an account before proceeding with the page transfer process.
Step 2: Claim responsibility for the page (if necessary)
If you haven’t already claimed responsibility for the page in question, you must do so before transferring ownership. Follow these steps:
- Inside Business Manager, navigate to Business Settings.
- Under Business Settings, click on Business Assets.
- From there, select Pages and choose the option to Claim a Page.
- A list of pages you manage will appear. Find the page you wish to transfer and click Claim.
- Once you’ve claimed responsibility for the page, you can assign a new owner.
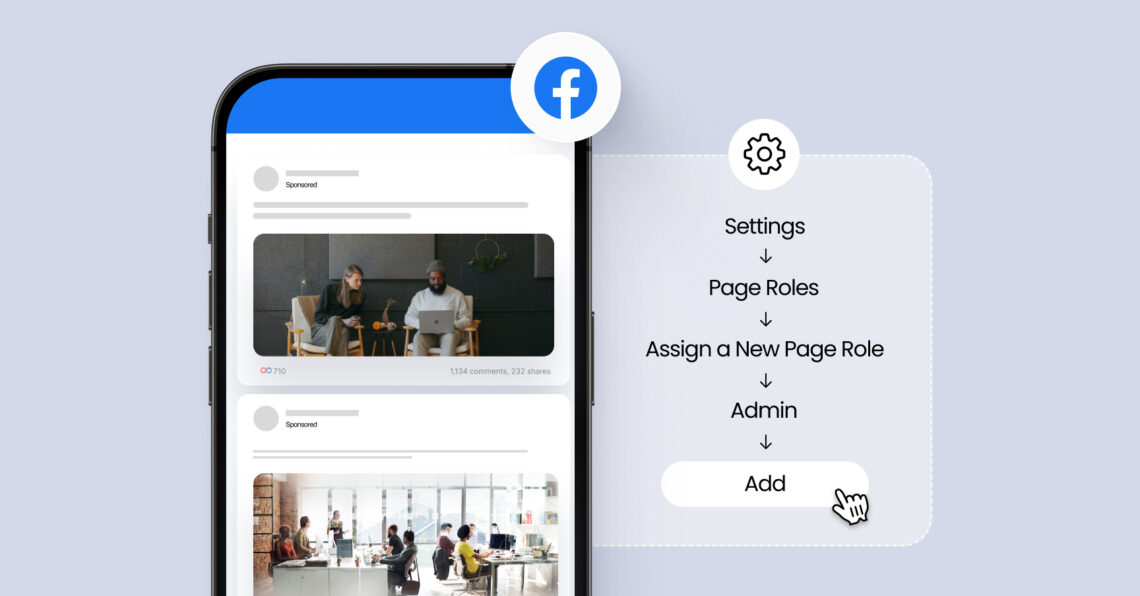
Step 3: Assign a new page owner
After successfully claiming the page, you can assign the new owner. Here’s how:
- Go to the page’s settings.
- Select Page Access from the menu.
- Under People with Facebook Access, you’ll see the current roles assigned to the page.
- Click Add New.
- Select the new owner, which could either be an individual or a verified organization.
- Assign them the Owner role from the available options.
- Click Give Access, and confirm the changes by entering your password.
- Now, the new owner will have full control over the page. Ensure that the new owner is verified on Facebook. If they are not, they won’t be able to accept ownership.
Step 4: (Optional) Request release of ownership from a business account
If a business account owns your Facebook page and you wish to release ownership, you can follow these additional steps:
- Go to the page’s settings.
- Select Page Access from the settings menu.
- Next to the page, you’ll find the option to Request Release.
- Click Request Release to initiate the transfer. Facebook will prompt you to confirm the action.
- Once the request is sent, you can click Done.
- The new owner can now claim the page and assume full control.
Essential considerations when transferring Facebook page ownership
While transferring Facebook page ownership is a relatively straightforward process, there are some crucial points you should keep in mind to avoid potential issues.

1. Business Manager is key
All ownership transfers must be done via the Business Manager. It’s a central hub for page management and security. Ensure both the current and new owners are familiar with the Business Manager.
2. Role assignments are crucial
In Facebook Business Manager, you can assign roles like Admin, Editor, Moderator, and Owner. The Owner role is the highest level of access, so only trusted individuals or organizations are assigned this role.
3. Verified accounts only
Facebook requires that the new owner be a verified individual or business. The transfer cannot occur if the new owner hasn’t completed the verification process, which checks the account’s legitimacy before granting additional privileges.
4. Ownership release is limited
You can only release ownership from one business account to another. If you no longer want to manage a page from your portfolio, you can remove it, but you cannot transfer ownership to another business portfolio.
5. Managing people’s access
Once ownership has been transferred, you can adjust the permissions of other individuals with access to the page. This is important if you have multiple people working on your page and need to control their level of access.
6. Gray account limitations
If the page is associated with a gray account (an unverified or suspicious account), you won’t be able to assign or transfer ownership. Ensure that all accounts involved are verified to avoid delays.
Conclusion
Transferring Facebook page ownership might initially feel overwhelming, but it’s simple when you follow the right steps. You can ensure a smooth and secure transition by using Facebook’s Business Manager and ensuring both the current and new owners are ready. Just remember to verify the new owner’s details, assign the correct roles, and double-check everything before finalizing the handover.
Learn How to Transfer Page Ownership
Want to see the impact of Birdeye on your business? Watch the Free Demo Now.
Frequently asked questions on how to transfer Facebook business page ownership
Yes. Facebook allows page ownership transfers through Facebook Business Manager by assigning a new owner with full administrative access.
Yes, someone else can take over your Facebook page if they are assigned the “Owner” role through the Business Manager. The new owner must be a verified individual or organization.
To change the primary owner, assign a new verified individual or organization as the “Owner” through the Page Access settings in Facebook Business Manager. Afterward, the new owner will have full control over the business page.
You must be a Page Admin or Business Manager Admin to assign a new owner.
Most ownership transfers require Facebook Business Manager, especially for pages managed by organizations or brands.
Ownership transfers are usually immediate once the new owner accepts the assigned role.
Yes. Owners can assign roles such as Admin, Editor, or Moderator to other team members.
Streamline social media management with Birdeye Social AI
Transferring Facebook page ownership is an important step during business or management changes. While Birdeye doesn’t manage ownership transfers directly, its social media management tool helps ensure your online presence stays consistent throughout the transition. As roles shift behind the scenes, Birdeye makes it easy to continue engaging with your audience without missing a beat.
This is where Birdeye helps enterprise teams stay in control. Birdeye is the #1 Agentic Marketing Platform built for multi-location brands, replacing fragmented marketing tools with a single enterprise platform that unifies customer data and deploys custom AI agents to drive marketing outcomes across locations.
With Birdeye Social AI, enterprise marketing teams can manage social media across hundreds of locations using AI agents designed to automate content creation, engagement, and performance insights.
Social AI Agents that power enterprise social media management
Birdeye’s Social AI agents help brands publish relevant content, respond to customer conversations, and uncover insights across every location.
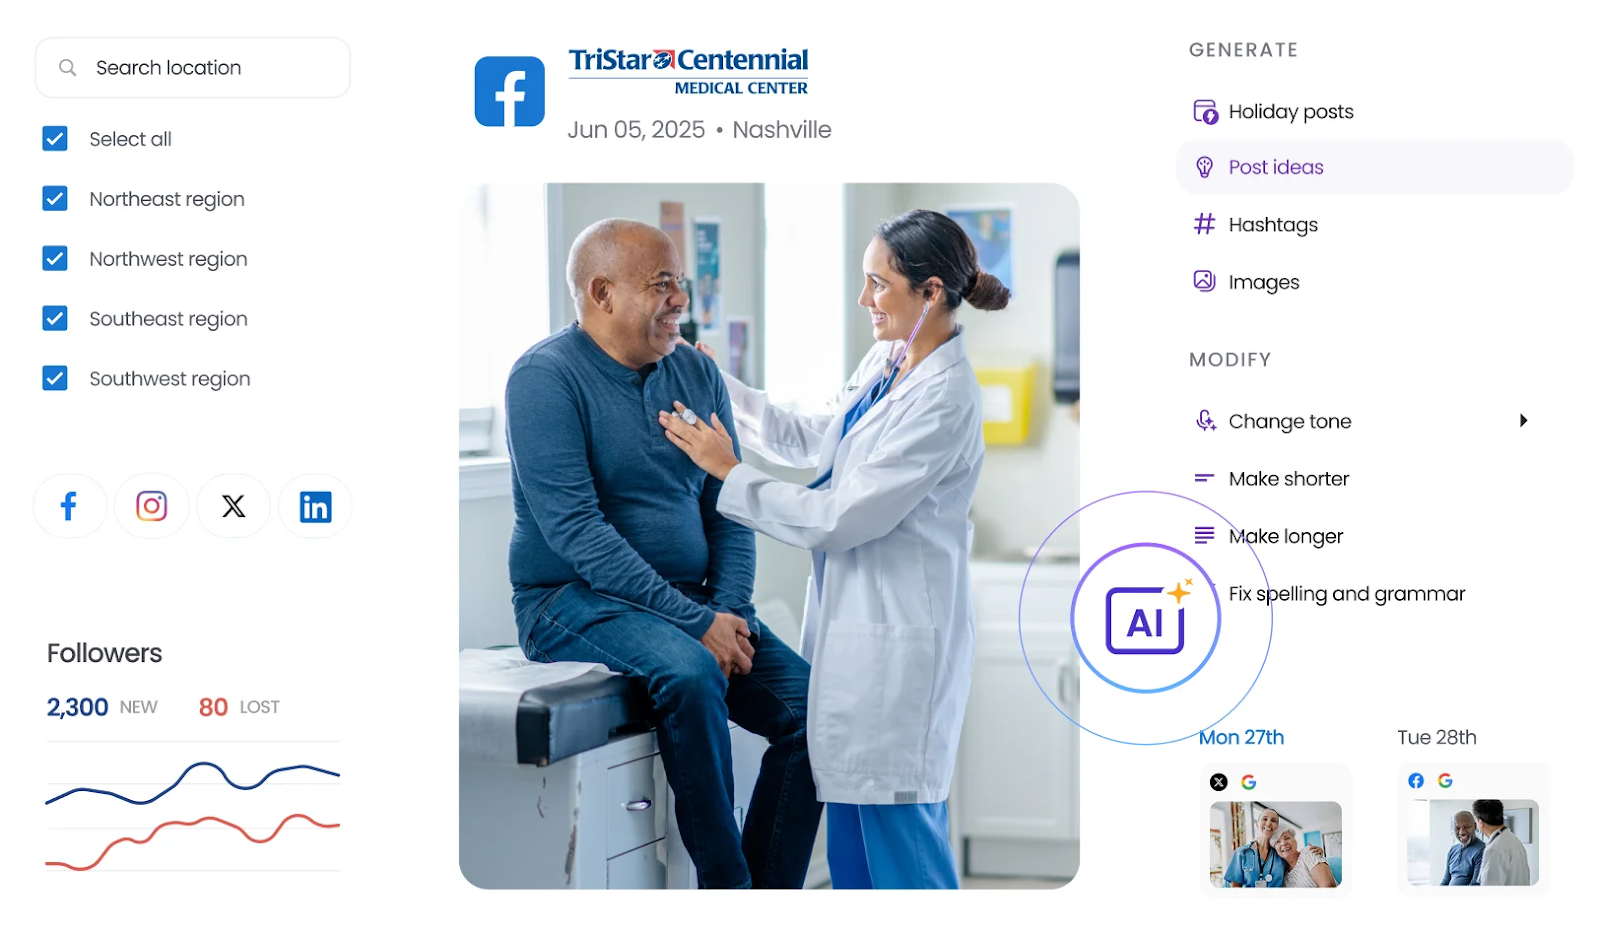
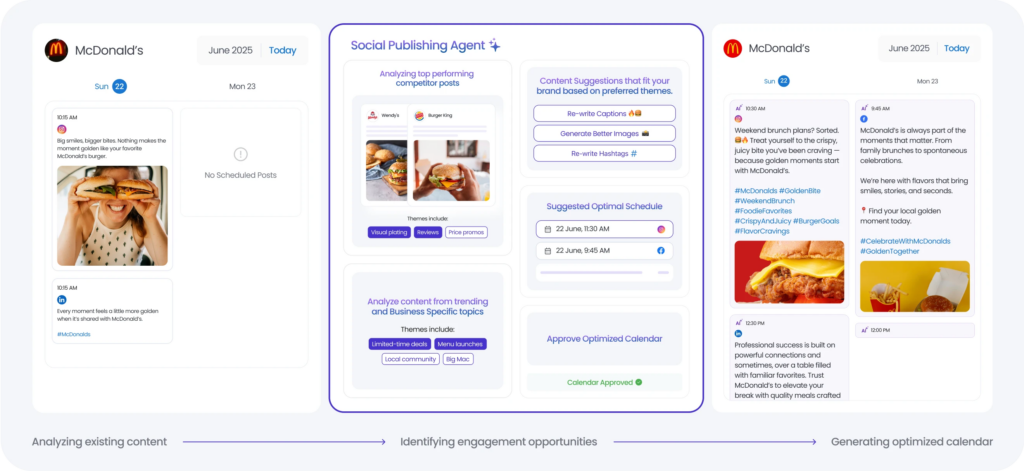
Social Publishing Agent
The Social Publishing Agent simplifies social media planning by analyzing top-performing posts, competitor activity, and trending topics to generate brand-aligned content ideas. It helps marketing teams schedule posts at optimal times and maintain a consistent publishing cadence across all locations.
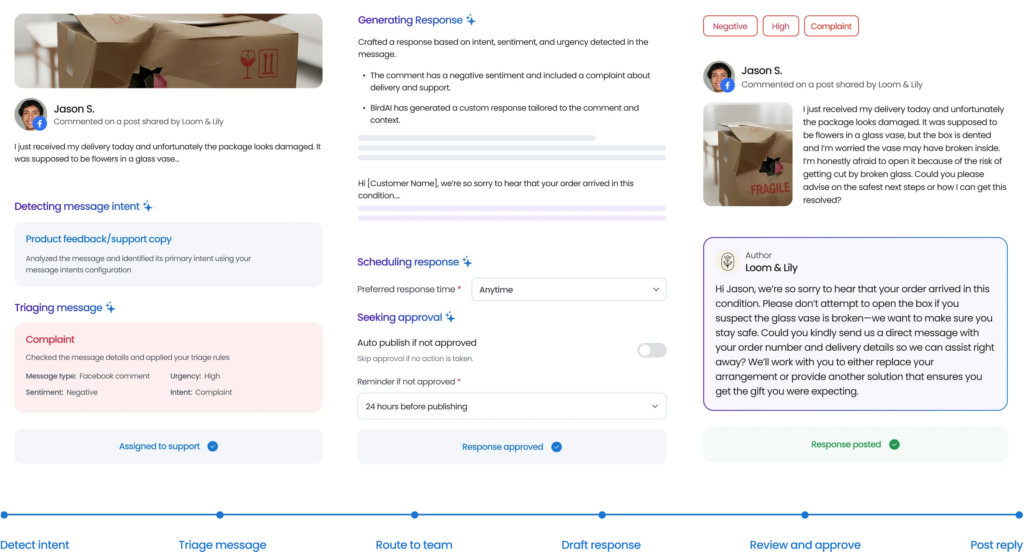
Social Engagement Agent
The Social Engagement Agent monitors comments, direct messages, and mentions across social channels. It detects sentiment and intent in customer interactions and drafts on-brand responses that help teams respond faster while maintaining brand consistency.
Social Reporting Agent
The Social Reporting Agent turns social performance data into actionable insights. It highlights engagement trends, identifies top-performing content, and provides clear visibility into social performance across regions and locations.
Social media management built for multi-location brands
With Birdeye Social, enterprise teams can:
- Manage multiple Facebook pages and social profiles from one dashboard
- Schedule and publish posts across locations
- Monitor comments and messages through a unified inbox
- Track engagement and performance insights across regions
- Analyze competitor social performance
By combining unified customer data with AI agents built for publishing, engagement, and insights, Birdeye helps multi-location brands scale social media management while maintaining a consistent brand voice across every location.
Ready to discover how Birdeye can transform your social media presence? Watch a free demo today.

About the Author
Vanjana Sharma
Originally published


![[Feature image]The best time to post on LinkedIn](https://birdeye.com/blog/wp-content/uploads/Feature-imageThe-best-time-to-post-on-LinkedIn-375x195.jpg)


![[Feature image] The Best Marketing Platforms for Multi-Location Brands](https://birdeye.com/blog/wp-content/uploads/Feature-image-The-Best-Marketing-Platforms-for-Multi-Location-Brands-375x195.png)